There's a universally loved dessert that transcends generations, brings instant smiles, and delivers a nostalgic hug with every sip: the mighty Oreo Milkshake. Forget complicated concoctions or expensive diner tabs. We're here to reveal the ultimate secret to a truly sublime, ultra-creamy, and intensely satisfying Oreo milkshake, crafted right in your kitchen with just three core ingredients.
Imagine a scorching summer afternoon, a lazy weekend, or just an undeniable craving for something sweet, cold, and utterly indulgent. Our easy 3-ingredient recipe for the best creamy Oreo milkshake is your answer. It's not just a drink; it's an experience – a dreamy blend of rich vanilla ice cream, the iconic crunch of Oreo cookies, and just enough milk to bring it all together into a symphony of flavor and texture. Ready in minutes, this isn't just a treat; it's a simple act of culinary magic.
Why This is the BEST Creamy Oreo Milkshake Recipe
What makes a good Oreo milkshake great? It's all about balance and simplicity. Our recipe zeroes in on these two pillars to deliver a shake that's undeniably superior. While many recipes overcomplicate things, we focus on the core elements that ensure a thick, spoonable (or straw-sippable) consistency and a flavor that screams "Oreo!" from the first sip to the last. This isn't just your average blend; it's designed to be a restaurant-quality dessert that outshines most commercial versions, all for a fraction of the cost.
The secret lies in the ratios. We ensure there’s a generous helping of Oreos to deliver that signature chocolatey crunch and distinct cookie flavor, perfectly complemented by a rich, vanilla ice cream base. The amount of milk is carefully calibrated to create a smooth, creamy texture that’s thick without being unblendable. You won't find yourself stirring a watery mess or struggling with a solid block in your blender. Instead, you'll achieve that perfect consistency, where every mouthful is a creamy dream interspersed with delightful bits of cookie. It's cold, it's thick, and it's perfectly sweet, making it the ideal treat to cool off or simply satisfy a sweet craving for the whole family.
The Simple 3-Ingredient Magic: What You'll Need
The beauty of this Oreo milkshake truly lies in its elegant simplicity. You only need three primary ingredients, most of which are likely already in your pantry or freezer. Opting for quality ingredients here will elevate your milkshake from good to absolutely phenomenal.
- Vanilla Ice Cream: The Creamy Backbone
Choose a high-quality vanilla ice cream. While any vanilla ice cream will work, a premium brand often has a richer, denser texture and a more pronounced vanilla flavor, which contributes significantly to the overall creaminess and taste of your shake. If you're looking for a dairy-free or lighter option, plant-based alternatives (like oat milk or coconut milk ice cream) can still provide similar creaminess and make an excellent substitute. Aim for about 2 cups per serving for a truly decadent shake. - Oreo Cookies: The Iconic Star
Naturally, the star of the show! Classic Oreos are perfect for this recipe, delivering that signature chocolate cookie and cream filling flavor. Don't be shy with them – we recommend about 6-8 cookies per serving for a robust Oreo presence. However, feel free to experiment with different Oreo flavors like Mint, Golden, or even Birthday Cake for a fun twist on the classic. The more Oreos, the more intense the cookie flavor and the more delightful chunks you'll have! - Milk: The Binding Elixir
Whole milk is generally recommended as it adds a wonderful richness and helps blend everything into a smooth, drinkable consistency. However, you have options! For a thicker shake, use slightly less milk. If you prefer a lighter shake, feel free to substitute with almond milk, oat milk, or even skim milk – just be aware it might slightly alter the richness and thickness. You'll typically need about ½ cup to ¾ cup of milk per serving, but this can be adjusted to your desired consistency.
The Secret (Optional) Fourth Ingredient: Vanilla Extract
While technically a 3-ingredient recipe for the base, a splash of vanilla extract can transform your Oreo milkshake from great to absolutely extraordinary. Even with vanilla ice cream, a little extra vanilla extract deepens the flavor profile, enhancing the natural sweetness and complementing the chocolatey goodness of the Oreos. It’s a small addition that makes a huge difference, truly hitting home that rich, dessert-like quality. Trust us on this one – you won't regret it!
Crafting Your Perfect Oreo Milkshake: Step-by-Step Instructions
Making this creamy Oreo milkshake couldn't be simpler. With just a few quick steps, you'll be sipping on a delightful treat in no time. No complicated techniques, no lengthy prep – just pure milkshake bliss!
- Gather Your Tools: You'll need a good quality blender, a measuring cup, and your chosen ingredients. For an extra chilled experience, consider placing your serving glasses in the freezer for 10-15 minutes beforehand.
- Add Your Ingredients: Start by adding the milk to the blender first. This helps create a liquid base that allows the blades to move more freely, preventing air pockets and ensuring a smoother blend. Next, add your vanilla ice cream. Finally, toss in your Oreo cookies. If you’re using that optional splash of vanilla extract, add it now too!
- Blend to Perfection: Secure the lid and start blending on a low speed, gradually increasing to medium. The key here is not to over-blend if you love those delightful cookie chunks! Blend just until the ingredients are combined and you reach your desired consistency. For a thicker shake with visible cookie pieces, blend for about 30-45 seconds. If you prefer a completely smooth shake with no chunks, blend for slightly longer until uniformly creamy. Remember, you need enough milk for the ice cream to blend smoothly without seizing up the blades.
- Adjust and Serve: Check the consistency. If it's too thick, add a tablespoon or two more milk and blend briefly. If it's too thin, you can add another scoop of ice cream or a few more Oreos and blend again. Pour your freshly blended Make Restaurant-Quality Oreo Milkshakes at Home: Thick & Sweet into your chilled glasses.
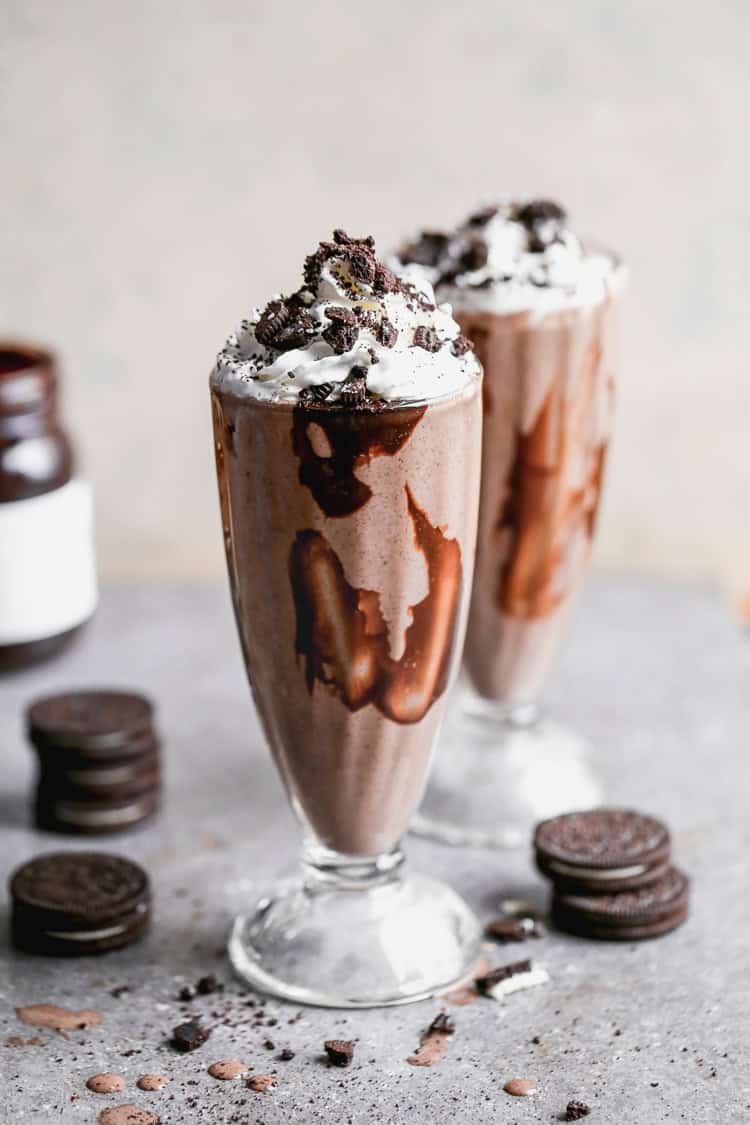
This is a thick Oreo milkshake recipe designed to be enjoyed with a spoon or a wide straw. The texture is part of its charm! Garnish with a dollop of whipped cream, a whole Oreo, or some crushed cookie crumbs for an extra touch of indulgence.
Elevate Your Oreo Milkshake: Customization & Pro Tips
While the classic 3-ingredient Oreo milkshake is a masterpiece on its own, its versatility is truly remarkable. Here are some ideas and pro tips to customize your shake and take it to the next level:
Customization Ideas:
- Flavor Twists:
- Double Chocolate: Swap vanilla ice cream for chocolate ice cream for an intensely rich, chocolatey experience.
- Minty Fresh: Use Mint Oreos or add a drop of mint extract for a refreshing twist.
- Nutty Delight: A tablespoon of peanut butter (or your favorite nut butter) blended in adds a wonderful depth and creaminess.
- Coffee Kick: Add a shot of espresso or a teaspoon of instant coffee powder for a delightful mocha Oreo milkshake.
- Fruity Fun: Believe it or not, a few frozen raspberries or strawberries can add an unexpected and delicious contrast.
- Toppings Galore:
- Whipped cream (homemade is always best!)
- Chocolate syrup or hot fudge drizzle
- Extra crushed Oreos
- Mini chocolate chips or sprinkles
- A cherry on top!
- Dairy-Free/Vegan Version: As mentioned, use a plant-based vanilla ice cream (oat milk or coconut milk varieties work great) and a non-dairy milk alternative. Many Oreos are naturally vegan, but always check the label!
Pro Tips for the Ultimate Shake:
- Temperature is Key: Ensure your ice cream is slightly softened, but not melted. This makes it easier to blend into a smooth consistency without overworking your blender.
- Don't Over-Blend: Unless you prefer a completely smooth shake, avoid blending for too long. A few quick pulses are often enough to combine ingredients while leaving those delightful cookie chunks. For more control over consistency and Unlock the Perfect Oreo Milkshake: Vanilla Splash & Custom Options, check out our guide.
- Chilled Glasses: A small step that makes a big difference! Pre-chilling your serving glasses in the freezer ensures your milkshake stays colder and thicker for longer.
- Ingredient Quality: While this recipe is budget-friendly, investing in good quality vanilla ice cream can truly elevate the flavor and texture of your homemade shake.
- Clean Up: Rinse your blender immediately after pouring your milkshake to prevent ingredients from drying and sticking, making cleanup a breeze.
Conclusion
There's something undeniably magical about a homemade Oreo milkshake. It’s an ultra-satisfying, nostalgic sweet treat that takes mere minutes to create but delivers maximum joy. From its irresistibly creamy texture to the delightful crunch of cookie bits in every sip, this easy 3-ingredient recipe proves that you don't need a fancy menu or a complicated process to create a truly delicious dessert. So, whether you're battling the summer heat or simply craving a moment of sweet indulgence, grab your blender and whip up this iconic classic. You'll wonder why you ever paid $5 or more at a diner when you can craft a bigger, better version right at home!
