Imagine a treat so creamy, so decadent, and bursting with the iconic flavor of your favorite sandwich cookie, that you'd swear it came straight from a gourmet diner. We're talking about the ultimate oreo milkshake – thick enough to eat with a spoon, perfectly sweet, and incredibly satisfying. The good news? You don't need a fancy establishment to enjoy this indulgence. With just a few simple ingredients and a blender, you can whip up a truly restaurant-quality oreo milkshake right in your own kitchen.
There's something undeniably magical about this blend of rich vanilla ice cream and crunchy cookies. It’s cold, thick, and perfectly sweet, with delightful bits of cookie in every sip. Whether you're trying to beat the summer heat or simply craving a nostalgic dessert after dinner, this recipe is guaranteed to satisfy. Forget paying upwards of $5 for a small diner shake when you can create a bigger, better version at home for a fraction of the cost. Let's dive in and unlock the secrets to your new favorite homemade treat.
The Simple Magic Behind the Perfect Oreo Milkshake
The beauty of a truly exceptional oreo milkshake lies in its elegant simplicity. You're not dealing with complex techniques or exotic ingredients; instead, it's about combining classic flavors in just the right proportions to achieve that dreamy, irresistible texture and taste. This isn’t just an average shake; it’s an ultra-satisfying, restaurant-worthy dessert ready in minutes, and it all starts with three core components:
- Vanilla Ice Cream: The Creamy Backbone
This is where your milkshake gets its luxurious body and smooth creaminess. While any vanilla ice cream will work, opting for a rich, high-quality brand truly elevates the flavor and texture. Think of it as the canvas for your masterpiece. For those with dietary preferences, plant-based alternatives made with oat or coconut milk can offer similar creaminess without dairy. - Oreo Cookies: The Iconic Star
Naturally, the humble Oreo is the undeniable star of this show. Classic Oreos deliver that signature chocolate crunch and creamy filling that we all know and love. However, don't be afraid to experiment! Different Oreo flavors like Mint, Golden, or even Birthday Cake can introduce exciting twists and personalize your shake. A good rule of thumb is about 6 cookies per serving, but feel free to add more if you crave an extra cookie crunch. - Milk: The Unifying Elixir
Milk is essential for blending all these delicious elements together into a cohesive, sippable (or spoonable!) consistency. Whole milk is often recommended for its richness, which contributes to a more indulgent texture. However, for a lighter version, or if you're exploring dairy-free options, almond, oat, or even coconut milk are fantastic substitutes that still deliver a great blend.
These core ingredients, when combined in the perfect ratio, create a harmonious blend that’s both indulgent and surprisingly easy to achieve. It's the ideal balance of creamy, crunchy, and sweet that makes this oreo milkshake so incredibly satisfying.
Crafting Your Thick & Sweet Oreo Milkshake: A Step-by-Step Guide
Ready to make your own? The process is remarkably straightforward. Here’s how to achieve that coveted thick and sweet texture:
Ingredients (Per Serving):
- 2 large scoops (about 1 cup) high-quality vanilla ice cream
- 6-8 classic Oreo cookies (plus extra for garnish, if desired)
- ¼ cup whole milk (adjust for desired thickness)
- ½ teaspoon vanilla extract (the secret ingredient!)
Instructions:
- Gather Your Tools: Make sure you have a sturdy blender. This is the only "cooking" equipment you'll need.
- Layer the Ingredients: For optimal blending, start by adding the milk and vanilla extract to the blender. This helps lubricate the blades. Next, add your scoops of vanilla ice cream, followed by the Oreo cookies.
- Blend to Perfection: Secure the lid and start blending on a low setting, gradually increasing the speed. The key here is not to over-blend, especially if you like those delightful chunks of Oreo in your shake. Give it a few pulses first to break down the cookies, then blend continuously until your desired consistency is reached.
- Adjust Thickness: This is crucial for that "restaurant-quality" feel. For a super thick, spoonable oreo milkshake, start with ¼ cup of milk. If the mixture is too thick for your blender to handle, or if you prefer a more sippable shake, add more milk, one tablespoon at a time, blending briefly after each addition until you reach your ideal consistency. Remember, you need enough liquid for the ice cream to blend smoothly, but too much will make it watery.
- Chunk Control: If you enjoy noticeable bits of cookie, blend just until combined. If you prefer a completely smooth shake, continue blending until all cookie pieces are fully incorporated. The choice is yours!
This simple process ensures you get that rich, creamy base with just the right amount of iconic Oreo flavor and texture. It truly is the best oreo milkshake recipe because the ratios are so forgiving and easy to adapt.
Elevate Your Oreo Milkshake: Tips, Tricks, and Customizations
While the basic recipe is phenomenal, there are several ways to take your homemade oreo milkshake from great to truly unforgettable. This is where you can infuse your personality and cater to every taste bud.
The Game-Changing Vanilla Splash
You might be thinking, "Why add vanilla extract when I'm already using vanilla ice cream?" Trust us, this seemingly small addition makes a profound difference. A splash of vanilla extract unlocks the perfect Oreo milkshake by intensifying the existing vanilla notes in the ice cream and rounding out the overall flavor profile. It brightens the sweetness and creates a more complex, well-balanced taste that perfectly complements the chocolatey Oreos. It's a culinary secret that truly hits home the vanilla flavor and pairs so well with the cookies.
Ingredient Quality Matters
As mentioned, a high-quality vanilla ice cream will significantly impact the final flavor and creaminess. The difference between a budget brand and a premium one can be surprisingly noticeable in a simple preparation like a milkshake. Similarly, using fresh, cold milk (especially whole milk) contributes to a richer, colder shake.
Beyond the Classic Oreo
Don't limit yourself to the original! Experiment with different Oreo flavors:
- Mint Oreos: For a refreshing, cool twist.
- Golden Oreos: For a lighter, vanilla-on-vanilla experience.
- Peanut Butter Oreos: If you're a fan of the peanut butter-chocolate combo.
- Double Stuf or Mega Stuf: For an extra creamy filling boost.
Creative Add-ins and Variations
The versatility of an oreo milkshake is one of its greatest assets. Make it your own with these exciting additions:
- Chocolate Lover's Dream: Substitute vanilla ice cream with chocolate ice cream for a double chocolate oreo milkshake. Add a drizzle of chocolate syrup to the glass before pouring.
- Peanut Butter Power: Add a tablespoon or two of creamy peanut butter for a nutty, rich flavor.
- Coffee Kick: A shot of espresso or a teaspoon of instant coffee powder can transform your shake into a delicious mocha oreo milkshake.
- Fruity Twist: A ripe banana can add natural sweetness and an extra layer of creaminess, reminiscent of a banana split.
- Caramel Swirl: Drizzle caramel sauce into the blender or swirl it into your serving glass.
Serving Suggestions
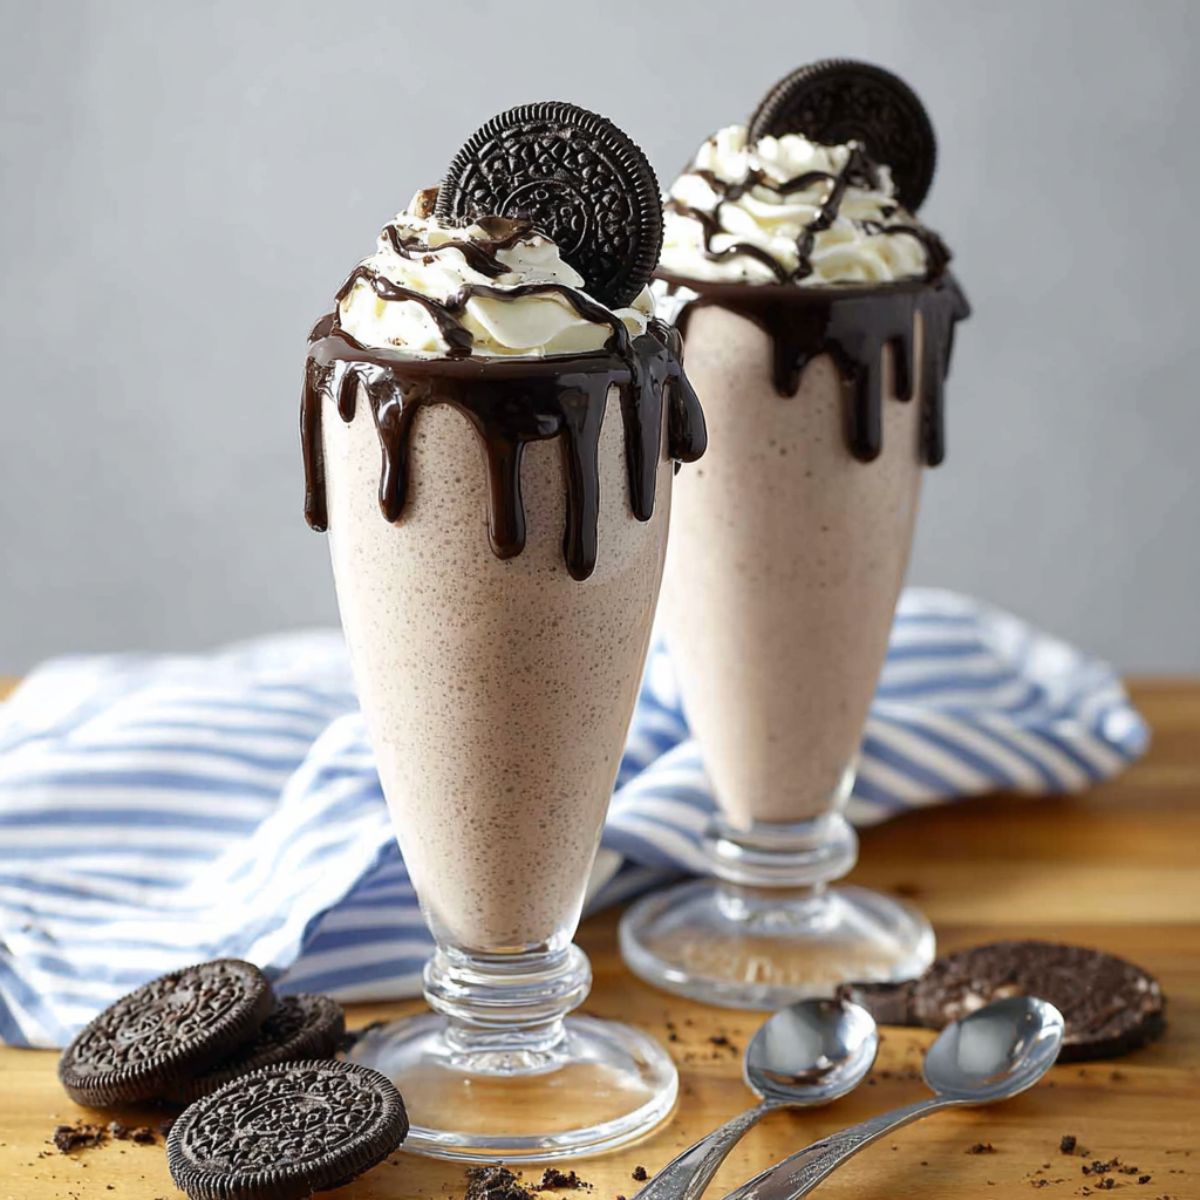
To really achieve that "restaurant-quality" presentation, don't forget the finishing touches:
- Top with a generous swirl of whipped cream.
- Sprinkle extra crushed Oreos over the whipped cream.
- Add a maraschino cherry for a pop of color.
- A drizzle of chocolate or caramel syrup adds an extra layer of indulgence.
- Serve with a thick straw or a long spoon, depending on your preferred thickness.
Why Homemade Oreo Milkshakes Reign Supreme
Beyond the sheer deliciousness, there are several compelling reasons why making your oreo milkshake at home is superior to buying it out:
- Budget-Friendly: Why pay $5 or more at a diner for a single serving when you can make a bigger, better version at home for a fraction of the cost? The ingredients are pantry staples that you likely already have or can easily purchase for multiple servings.
- Freshness and Control: You know exactly what's going into your shake. No questionable syrups or preservatives. You control the quality of the ingredients, ensuring a fresh and wholesome treat.
- Customization to Your Heart's Content: As we've explored, the possibilities for customization are endless. You can tailor every aspect – from thickness and sweetness to flavor combinations and dietary adaptations – precisely to your liking.
- The Joy of Creation: There's immense satisfaction in creating something delicious with your own hands. It's a quick, fun activity that can involve the whole family, making it an experience as enjoyable as the treat itself.
Once you try this recipe, you'll find yourself reaching for the blender again and again. It's not just a dessert; it's a quick escape, a nostalgic indulgence, and a testament to how simple ingredients can create extraordinary flavor.
So, the next time that craving for a thick, sweet, and utterly delightful oreo milkshake strikes, skip the drive-thru. Head to your kitchen, gather your simple ingredients, and within minutes, you'll be enjoying a homemade masterpiece that rivals any restaurant creation. It's the perfect treat to cool off on a hot day, satisfy a sweet tooth, or simply enjoy a moment of pure, unadulterated bliss.
