Unlock the Secret to the Best Thick & Creamy Oreo Milkshake
Few treats evoke such widespread delight as a perfectly crafted Oreo milkshake. It’s more than just a drink; it's a nostalgic journey, a sweet escape, and the ultimate indulgence rolled into one frosty glass. But not all Oreo milkshakes are created equal. If you've ever dreamt of a homemade version that rivals your favorite diner's, boasting an unrivaled thickness, an impossibly smooth texture, and an explosion of genuine Oreo flavor, you've come to the right place. We're about to unveil the simple yet crucial secrets to achieving that creamy perfection every single time.
Forget thin, watery shakes or those lacking that true cookie punch. This guide will walk you through the essential ingredients, the precise ratios, and the expert techniques that transform a few basic components into an extraordinary culinary experience. Whether you’re seeking a rapid cool-down on a scorching afternoon or simply craving an irresistible dessert for the entire family, prepare to master the art of the thick, luscious, and utterly satisfying Oreo milkshake.
Why Homemade is Always Best
While convenience stores and fast-food chains offer their versions, nothing compares to a homemade Oreo milkshake. You control the quality of ingredients, the level of sweetness, and most importantly, the consistency. Plus, the satisfaction of whipping up such a decadent treat in mere minutes is a reward in itself.
The Foundation of Flavor: Essential Ingredients for the Perfect Oreo Milkshake
The magic of an exceptional Oreo milkshake begins with its components. While seemingly straightforward, selecting and understanding the role of each ingredient is paramount to achieving that ideal balance of flavor and texture. Our recipe keeps it simple, focusing on core elements that deliver maximum impact.
- Vanilla Ice Cream: The Creamy Canvas (4 cups)
This isn't just a filler; it's the heart of your milkshake's creamy body. Opt for a high-quality vanilla ice cream. Its pure, sweet foundation allows the distinctive Oreo flavor to shine through beautifully. While you don't need to be hyper-precise with measuring 4 cups – a generous amount of scoops will do – aim for enough to create a substantial, thick base. - Oreo Cookies: The Star of the Show (12 cookies)
Naturally, you can't have an Oreo milkshake without Oreos! Twelve standard Oreo cookies provide the perfect ratio to ensure every sip is bursting with that iconic chocolatey, creamy goodness. Regular Oreos are fantastic, but don't shy away from using Double Stuffed for an extra burst of cream, or even different flavored Oreos if you're feeling adventurous (more on this later!). - Milk: The Unifying Liquid (½ cup)
This is where the 'secret' to thickness truly begins. Just ½ cup of milk (any kind works, from 1% to whole milk) is precisely enough to help the ingredients blend into a smooth, drinkable consistency without watering down the richness. Whole milk will yield a slightly richer, creamier result, but even skim milk will work thanks to the ice cream's fat content. For those looking for a healthier alternative, almond milk is a fantastic choice that doesn't compromise on flavor. - Vanilla Extract: The Flavor Enhancer (¼ teaspoon)
Yes, you read that right – extra vanilla, even though you’re using vanilla ice cream! This is one of the most underrated secrets to an extraordinary Oreo milkshake. A mere ¼ teaspoon of vanilla extract deepens the overall flavor profile, creating a more complex and satisfying sweetness that truly "hits home" and complements the Oreos beautifully. It’s a subtle addition that makes a profound difference, elevating your shake from good to absolutely unforgettable.
Crafting Creaminess: The Art of Blending and Ratios
With your ingredients gathered, the next step is the simple yet crucial act of blending. This is where you transform separate elements into a harmonious, thick, and utterly delightful treat.
The Perfect Ratio is Key
The magic of this recipe lies in its carefully calibrated ratios. The ½ cup of milk to 4 cups of ice cream might seem like a small amount of liquid, but it's precisely what creates that spoon-worthy, thick consistency we're aiming for. This ensures the milkshake is robust enough to stand up to the chunks of Oreo while remaining perfectly blendable.
The Blending Technique: Smooth or Chunky?
Your personal preference dictates how long you blend. For a completely smooth, velvety Oreo milkshake where the cookies are fully incorporated, blend until no visible chunks remain. However, many enthusiasts, including us, prefer a slightly less vigorous blend. This leaves delightful, tiny shards of Oreo cookies throughout the shake, adding a wonderful textural contrast and an extra burst of cookie flavor with every sip. If you prefer chunks, blend just until the mixture is combined and creamy, stopping before it's perfectly smooth.
Achieving Your Desired Thickness
This recipe yields a very thick milkshake, often best enjoyed with a spoon or a wide straw. If you find it too thick for your liking, you can easily adjust it:
- For a Thinner Shake: Add an extra tablespoon of milk at a time, blending briefly after each addition, until you reach your preferred consistency.
- For an Even Thicker Shake: Start with slightly less milk (e.g., ¼ cup), adding more only if absolutely necessary to get the blender moving. Be careful not to omit too much milk, as the blender needs some liquid to properly process the ice cream and cookies.
Remember, the goal is to achieve a balance where the milkshake is thick enough to feel indulgent but still liquid enough to enjoy.
Elevate Your Shake: Creative Toppings and Flavor Twists
While the classic Oreo milkshake is divine on its own, a world of customization awaits! These additions not only enhance the visual appeal but also introduce exciting new dimensions of flavor.
Classic Indulgences
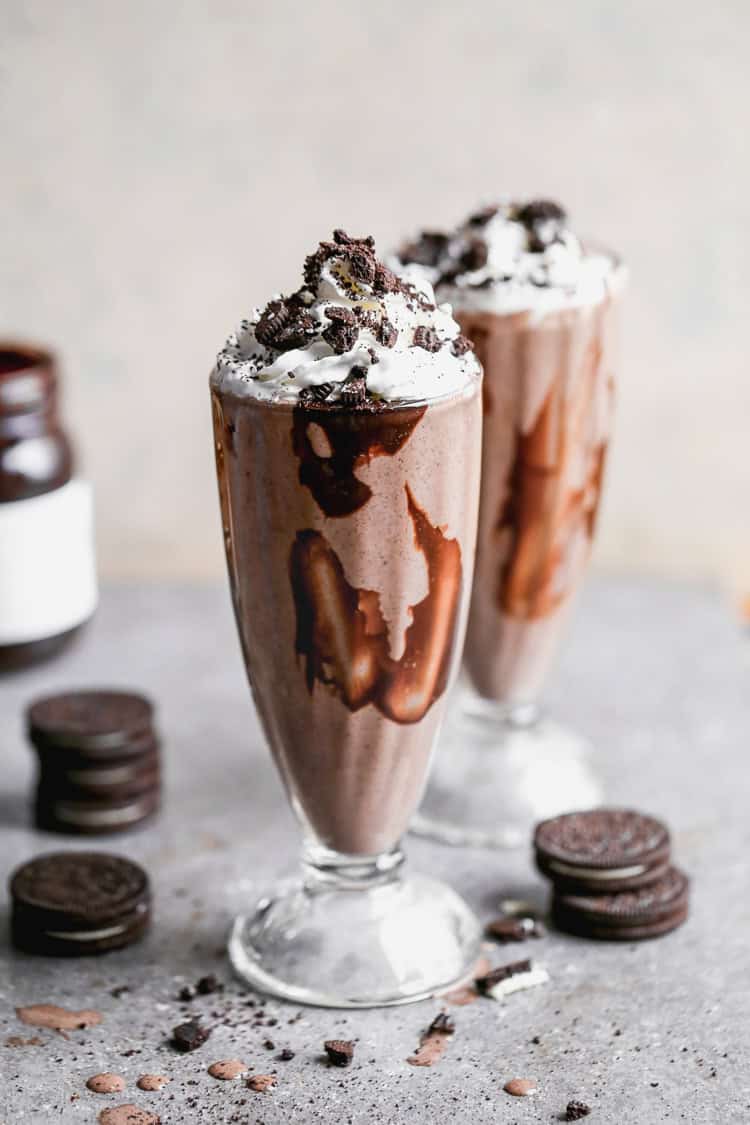
- Whipped Cream: A generous dollop of freshly whipped cream is a timeless topping, adding an airy lightness that contrasts beautifully with the dense shake.
- Crushed Oreos: Sprinkle extra crushed Oreos on top for an added layer of texture and intensified cookie flavor. This is particularly appealing if you opted for a smoother blend inside the shake.
- Hot Fudge Sauce: A luscious drizzle of warm hot fudge sauce cascading down the sides of the glass or pooled on top of the whipped cream transforms your shake into a true dessert masterpiece.
Gourmet Flavor Twists
Don't be afraid to experiment with your Oreo milkshake to discover new favorites!
- Caramel Oreo Milkshake: A simple drizzle of caramel sauce over the top, or even blended into the shake, adds a rich, buttery sweetness.
- Double Chocolate Oreo Milkshake: Swap out the vanilla ice cream for chocolate ice cream. Crucially, still add that ¼ teaspoon of vanilla extract! It enhances the chocolate flavor surprisingly well, preventing it from tasting flat.
- Peanut Butter Oreo Milkshake: Add a generous scoop of creamy peanut butter (about 1-2 tablespoons) to the blender with the other ingredients for a nutty, salty-sweet sensation that pairs perfectly with Oreos.
- Mint Oreo Milkshake: This is a fan favorite! Combine mint-flavored Oreos with mint chocolate chip ice cream for a refreshingly cool and decadent treat. A tiny drop of mint extract could further boost the flavor.
- Different Oreo Varieties: The world of Oreos is vast! Try using Golden Oreos for a vanilla-forward shake, Red Velvet Oreos for a festive twist, or even seasonal flavors as they appear.
Healthier/Dietary Alternatives
For those with dietary considerations or just looking to lighten things up:
- Dairy-Free Option: Use a high-quality dairy-free vanilla ice cream and almond milk. For an even healthier, dairy-free alternative, consider blending almond milk with frozen bananas instead of ice cream, then adding your Oreos and vanilla extract.
- Almond Milk: As mentioned, almond milk works wonderfully as a direct substitute for cow's milk, offering a slightly lighter taste without sacrificing creaminess.
Pro Tips for the Ultimate Oreo Milkshake Experience
To truly unlock the secret to the best thick and creamy Oreo milkshake, keep these expert tips in mind:
- Pre-Chill Your Glasses: For an extra frosty treat that stays colder longer, pop your serving glasses in the freezer for 10-15 minutes before blending.
- Don't Overfill the Blender: Work in batches if necessary. An overfilled blender can lead to uneven blending and a less consistent texture.
- Use a High-Powered Blender: While not strictly necessary, a robust blender makes quick work of ice cream and cookies, ensuring a smoother result with minimal effort.
- Serve Immediately: This is a crucial tip! Milkshakes are best enjoyed right after blending. They melt quickly, and while you can freeze and re-blend them, the texture won't be quite the same as a fresh shake. Embrace the instant gratification!
- Thick Straws or Spoons: Given the incredible thickness of this Oreo milkshake, arm yourself with a wide straw or even a long spoon. You'll thank us later.
Conclusion
Crafting the perfect thick and creamy Oreo milkshake at home is not just a dream, it's an easily achievable reality. By understanding the critical role of each ingredient, particularly the subtle yet powerful addition of extra vanilla extract, and mastering the simple blending techniques, you can create a dessert that is consistently rich, satisfying, and bursting with authentic Oreo flavor. Whether you stick to the classic recipe or venture into adventurous flavor combinations, this guide provides all the secrets you need to impress yourself and your loved ones. So, grab your blender, gather your ingredients, and prepare to indulge in the ultimate homemade Oreo milkshake experience. Cheers to deliciousness!
